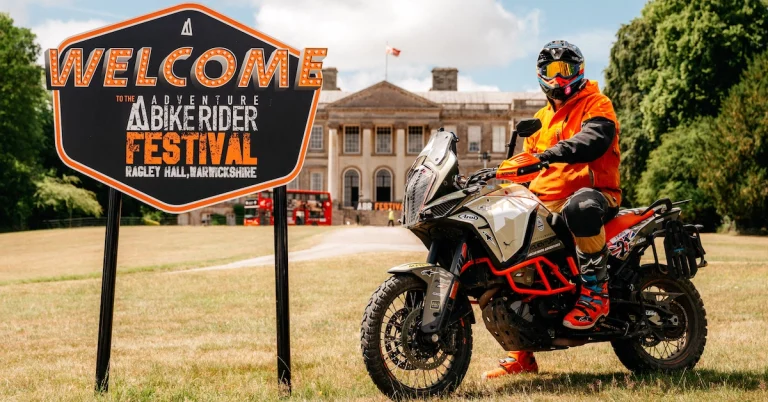
Project GSX-Reborn: Episode 2

By

BeMoto Project GSX-Reborn Episode 2 banner - Braking Bad

Welcome to BeMoto Project GSX-Reborn. The story so far...

Having been given a derelict and rotten Suzuki GSX-R600K3, the idea is to give it a new lease of life and turn it into a track bike.

After the initial assessment, it's clear that some of the parts are only fit for the skip. Yet amazingly given the state of the rest of the bike, the engine is a runner. I got it to fire up on all four cylinders thanks to a liberal squirt of Easy Start.

So my next task is to get the GSX-R to run on its own, and this will mean replacing or cleaning all the fuel system's major components.


Braking bad

With a big project like this, it'd be easy to get overwhelmed by just how much needs to be done. But I've decided to take a methodical approach and tackle each of its many profound issues one at a time, in a logical order – well, one that makes sense to me, anyway!

We've already briefly fired up the engine with a sniff of Easy Start and discovered that it runs, so that's really good news. Then the next thing was to unseize the brakes, which I need to do now because they are binding so much that the bike cannot be moved, meaning that it's a proper pain to roll out the way when I need to get another bike on the bench.

To be honest, I'd never seen a set of motorcycle callipers so rotten! They were covered in white oxidised powder, peppered with plenty of rust, and there seemed to be some sort of weird lichen feeding off the weeping brake lines! Check out the pictures and you will see what I mean.

Dirty old GSX-R600 brake callipers & pads

Dirty old GSX-R600 seized brake callipers

Removing them was challenging, they needed to be superheated with my heat gun, and only then did they start to come off. The plan is to get the callipers stripped and cleaned, then make a call on whether they are actually still serviceable - if they are, they will be rebuilt with new seals and brake pads. Then I'll link them to new HEL brake lines, and possibly a new HEL master cylinder, too.

Check out my step-by-step guide on how I tackled the callipers... Back to Basics - How to strip and rebuild a motorbike brake calliper.


Like a giant mechanical turd...

Next job is to take a look at the fuel system, this includes everything - even the filler cap. I have already drained about 14 litres of foul-stinking, thick, orange liquid from the fuel tank. It's so bad that I can't believe the stuff was once petrol - it even ruined my petrol syphon in the process of sucking it out!

One thing I did notice when I peered into the tank with a torch was the state of the filler cap, it was partially seized and would only lock down with excessive force. Inside the tank was just tons of red rust and this had also contaminated the immersed fuel pump. Luckily, removing the fuel pump is a straightforward job as it simply unbolts from the bottom of the tank. With the bolts removed I gently removed the pump and couldn't believe it, yes the pump was absolutely caked in a rusty-coloured snot, which started to change shades before my eyes as the warm air in the workshop started to dry it out. Again, seeing is believing, check out the picture because this fuel pump is as bad as it gets, and removing it was like extracting a giant mechanical turd!

Dirty old GSX-R600 fuel from rusty old tank

Rusty fuel filler cap on the BeMoto project Suzuki GSX-R600

Rusty fuel pump from the BeMoto project Suzuki GSX-R600

Rusty fuel pump on the BeMoto project Suzuki GSX-R600


Rodent penthouse

It was at that point where I very quickly came to the conclusion that everything in the fuel system was knackered. Yes, I could try to clean the rust out the tank, and make an effort to clean the fuel pump. But the reality was that it would take hours and hours to do and even then might not be good enough to work properly. And let's face it, there are loads of GSX-R bits readily available at breakers and on eBay so just buying a secondhand replacement was a more time and cost efficient route.

With the petrol tank and fuel pump heavily soiled with crap, I was not going to give the fuel injectors the benefit of the doubt, so they were going to be lobbed and a replacement set added to the growing list of required bits.

Old parts removed from the BeMoto project Suzuki GSX-R600

You may remember in the previous update I mentioned the airbox, and although it won't be contaminated with bad fuel, I still found it hard to believe that it wouldn't be riddled with mouse crap and the remnants of an air filter that had been up-cycled into some sort of swanky rodent penthouse!

So it was with a little bit of trepidation that I slowly undid the crosshead bolts that secure the top of the airbox. Then, lifting the lid, to my amazement I wasn't met with horror, but relief. In fact the internals of the airbox were absolutely perfect, just liked it had been taken apart and cleaned yesterday.

BeMoto project Suzuki GSX-R600 air box


Breaker, breaker

Now it was time to go shopping for parts.

I first called up my local bike breakers, but they had nothing. After that, my next port of call was Ken Urwins' up in Thorne – and they came up trumps with everything. They sorted me out a fresh tank with no rust, a fuel pump that looked mint, and a complete set of injectors that were also mint, all for £220. The retail price of these parts is well in excess of £3500, so I thought this was a proper bargain!

Fitting the bits is relatively straightforward, the only thing left to remove are the old injector bodies. This is easily done by undoing the electrical connectors and throttle and choke cables, and loosening the throttle body clamps. Initially they would not let go of the inlet rubbers until I warmed them up with a heat gun and that was enough for the rubber to become supple enough to allow removal.

With the old bodies out of the way I could now see down the inlet tracts and the back of the inlet valves. Everything looked good, aside from quite a bit of scuzz around the inside of the inlet rubber where the injector bodies had started to corrode. With that in mind, I removed the inlet rubbers from the bodies one by one and gave them a clean. The two screws that retained each rubber were really stubborn to remove, so it was time to blow the dust off my old impact screwdriver. It's been a long time since I got that out, but it worked a treat. One thing I am having to get used to is working on a bike that is dirty and corroded, a lot of the GSX-R's fasteners and brackets are rusty, which gives each task added difficulty. I can clean the dirt and cobwebs away, but the fasteners and stuff will have to be replaced.

After I removed them, I placed the old injectors on my bench and straight away they started to ooze out orange tainted petrol onto the surface, confirming my prediction that they were contaminated. As expected the secondhand replacement injectors fitted perfectly and all the connectors and pipes plugged straight in to their existing counterparts.

Removing the throttle bodies on the BeMoto project Suzuki GSX-R600

BeMoto project Suzuki GSX-R600 injectors with old fuel

Removing the inlet rubbers from the BeMoto project Suzuki GSX-R600

The same with the fuel pump and tank, it all went together as expected. I fitted a new genuine Suzuki O-ring gasket, as the old one was of course looking sorry for itself, as it was miss-shaped and was starting to crack.

Then the moment of truth, a drop of fresh petrol into the tank and I press the starter - almost immediately it fires into life. Project GSX-Reborn is a runner! Brilliant. I run it up until the temperature is high enough to kick the cooling fan in, and then let it cool down.

If you are having issues with your bike's fuel pump and have looked at the price of a new one, it's most likely that your jaw would've hit the floor. The price for a new fuel pump for this GSX-R600 K3 is £1,267.07! Ouch! Fortunately, there are other options available... In our case, original fuel pump was scrap, so we lucked out with sourcing a good secondhand one.

New fuel pump for the BeMoto project Suzuki GSX-R600

Suzuki O-ring gasket for the BeMoto project GSX-R600

If your bike's pump is serviceable, another option is to go for a pump refurb kit. Having checked in with some mates in the trade, the go-to rebuild kits are the Allballs Racing ones; other brands worth considering are the Quantum kits. It was also said that there are new fuel pumps on eBay that appear really cheap but they can be problematic.

Injectors are also expensive to replace, but there are some specialists out there that can test and service them.

For the next update, I'm going to sort out the forks, as the stanchions are badly pitted and will most likely need replacing. Also, the steering bearings feel a bit notchy, so they will replaced with new ones. If there's time I will also give the engine a service with new plugs, air filter and maybe even check the shims.

Special thanks to:


GSX-R600 K3 spend so far... £1,484.94

Last time we spent £93.94 on parts, and £1,000 on the bike. These are the bits we bought this month.

  • Fuel tank, fuel pump and injectors, Ken Urwin £220.00
  • Race bodywork including another tank, Track Day Addicts (TDA) group £80 + £50.00 courier (£130.00 including delivery)
  • Race fuel cap eBay £41.00

Total £391.00

Tally: £1,484.94 (including the bike)

Target: £3,000 (including the bike)

Look out for Episode 3 where we look at rebulding the forks.

Also, why not check out our various track and race bike insurance products to see how BeMoto can help insure you, your bike(s) and your race van.


Back

Discussion